We've moved!

You will be automatically redirected to our new home in 5 seconds. If that does not occur,or you don't want to wait, visit
WordsOnWendhurst.com
Don't forget to update your bookmarks!

Showing posts with label basement. Show all posts

Wednesday, April 7, 2010

Construction Zone

When you are in the throes of a huge remodeling project, it is important to keep a sense of humor. If not, you will burn out almost immediately. :-) Not that I speak from experience.

With that advice in mind, we created this fun little sign to place at the bottom of our basement stairs, as you enter the crazy zone.


It says, "Construction Zone"  "Watch your step! And your head, your feet, and any other body part you care about."


It makes me smile every time I go down to the basement. :)

Monday, April 5, 2010

Can you see why I was stressed?

A month or two back I talked about how stressed out I was over the basement remodel. . While I am currently receiving therapy for this, I want you to understand that my stress was not unfounded. Here are a few pictures that will illustrate why I was so stressed.

Exhibit A:


The lighter area is where the new laundry room is now located.

1. Here's where the washer and dryer used to be. Now they are under the electrical panel. And, yes, I had to do laundry while the basement looked like this.

2. Here is the window that is under our deck, that we converted to a vent panel. It now vents the dryer and the fan for the bathroom.

3. This is the "Main Stack" for the plumbing. I painted it turquoise. It is now accessible, unlike before where it was hidden in the wall, behind a mirror.

Exhibit B:


This is our bathroom. Isn't it beautiful? :-)

4. The toilet stack, plugged with rags. Ew.

5.  Where we (and by we, I mean Lover and my brother) found the centipede nest. Oh, and while we are on that subject, some big suckers have been showing up now that the weather is getting nicer. We (again, loosely using the term "we") summarily dispatched them to Centipede Heaven. (Is there such a thing?)

6. This is where we are installing the shower. It's going to be awesome. Cannot wait.

7. We had to rebuild the support for the stairs for the basement. We're assuming that at one point there was adequate support, but the P.O. removed it because... that is the kind of thing they would do. :-)

So now you can empathize with me a little better. Right? Or am I just a whiny brat? Do I need to subject you to the pictures of the centipedes again for you to pity me a little? Go here. I dare you. But don't say I didn't warn you.

Tuesday, March 23, 2010

Inspiration Tuesday: Alphabet Office

OK, how seriously cool is this office?  I am luvin it. I was on Rate My Space browsing for basement ideas (and anything else inspiring) and stumbled upon this little gem.


I'm not one to simply copy  a design, but I think this room is stellar. That awesome wall treatment is done by projecting words onto the walls and painting them, and then layering silver wall  words over top of them.

The room cost under $1500 to do start to finish, and you could probably come in even cheaper if you have a good Craigslist in your area.


The floor is laminate wood, and don't you love that crisp white trim against the gray walls? I also love how they worked around the basement windows by simply adding ap picture ledge beneath the window. The big items in the room are from Ikea and TJ  Maxx, and don't you love the collection of white accessories?


I love the interest that they added to the ceiling, so that it doesn't look so basement-y


And purple and turquoise add the perfect splash of color.

So what do you think? I think I love this room a little more each time I look at it. Feel free to comment here, or head over the Rate My Space to comment on this room!

Wednesday, February 24, 2010

Basement Overhaul: The Befores

As we are making good progress on the basement, and things are starting to resemble real rooms and areas again, I thought you might like to see what the basement looked like when we bought the house. Prepare yourself, as these pictures are sure to produce a strong reaction. Not an "aw!" reaction, more like a "yikes!" reaction. :-)

Are you ready? Ok, here we go. Here are the stairs that lead down to the basement. Fancy schmancy, eh? We kept those "BAR" letters, because they were just too darn tacky to throw away. Watch for them in the final reveal, we'll find a new home for them. :-)


Here's a picture looking up the stairs, so you can see where everything is in the basement.


Ok, when you reach the bottom of the stairs, on your left is the kitchen. Here's that enormous freezer I've talked about in the past.


Through the kitchen is the storage room, which came complete with green shag carpeting and three thousand two-prong extension cords (i.e. pretty useless cords)


Now, come back out of the storage room and go back to the stairs. On the left hand side is the "bar" area. Apparently they were going for a "watering hole" style of decor with the wooden corral bars and the overabundance of wood. And yes, those stools came with the house. I think they're in the attic right now. Isn't that shag on the walls and ceiling AWESOME!


The wooden bar was covered with green contact paper. Don't ask why, as I really don't know. See that black slanted "roof" on top of the bar? When we first toured the house there was a collection of baseball caps up there. Thankfully, they were gone when we bought the house. You can just barely make out the orange and brown shag carpet ont the wall where the lamp is, and on the ceiling.


Here's a better picture of that whole corner, where you can see the bar, the keg fridge that came with the house, the random brick wall and the lovely lighthouse poster that was left for us.


On the right of the brick wall (which is only about six feet long) was this builtin bookshelf extravaganza, covering the gas meter and the water main. The backs of the bookshelves are padded with red shag. The black panels "hide" the gas meter. They actually had really interesting handles on them, but the previous owners took them off before we bought the house. (!?!)


Just past the bookshelves is the TV corner. We're now on the right side of the basement. This whole entertainment center was built in to the wall, and that fireplace?? It's not real. They built an entire corner fireplace, with real brick and mortar, and then put an electric "fire" inside. Sigh. That thing was a bear to remove.


Moving on. In the opposite corner there was a lovely wall of mirrors. See that lovely pendant light? (gag!) Here's another one of the wall decorations we inherited, that covered up a missing mirror tile. I'm not sure why they covered it instead of replacing it, we found an entire box of leftover mirror tiles in the garage. Oh well.


Ok, all that's left to see is the bathroom. The toilet is straight on when you walk in, elevated on lovely brick red tiles. Why, I am not sure.


To the right is a built in closet, with mirrors, and a support post that has been mirrored as well. The mirrors help the space "feel bigger."  Don't you think?


To the left is the vanity, with a gold mirror and another wall of mirrors. The gold mirror was covering up a huge hole in the wall that allowed "access" to the water shutoff valves for the basement.


And lastly, the laundry room. Go through the carpeted doors, (ew!)


and you are greeted with this. Paneling in front of you,


fish wallpaper on the left


and this psychedelic cabinet on the right. Lovely, no?


We won't talk about how the wallpaper is covering what used to be a doorway, before they stuffed drywall in it and paneled the other side. We also won't talk about the backwards-in the corner laundry sink, or the fact that it is directly under the electrical panel. Because, really, isn't that the way YOU would set this room up?

So that's the basement's befores. Oh, and if you're wondering about where the covered up windows were, they were here,


and here.


This one is the one we had replaced with the glass block window. The other one already was glass block, they had just paneled right  over it.

I do have this to say, in the previous owners' defense. If they hadn't created such a garish basement, our before and afters wouldn't be nearly as impressive. :-) I mean, anything is going to be better than this, right?

Tuesday, February 23, 2010

Inspiration Tuesday: Candice Olson Basements

Are you tired of hearing about our basement yet? I'm sorry. We're tired of working on it too. :-) This week we're taking a well deserved rest from the renovations and spending some serious time together, relaxing and reconnecting. In the mean time, here are some great basement designs from Candice Olson.


Tuesday, February 16, 2010

Inspiration Tuesday: Basement Thoughts


This viewing room was designed by Windsor Smith.  And because I have basement brain, it's inspiring me to think of colors for the basement. We're considering leaving the floor joists exposed, instead of drywalling the ceiling. They're not as high as the ones in this picture, but they are about seven feet up there, so there's plenty of clearance. We've even talked about installing lights similar to these to direct the light down out of the joists.

I'm not typically a fan of red and tan together, although I think this room pulls it off quite well. I know that I definitely want to do really warm tones in the basement though, because of the fact that it is a basement. And even though we're putting drywall over the cinder block and we'll be using lots of really thick, plush rugs,  it's still a basement, so I want to make it as visually warm and cozy as I can.

I like the idea of using an old trunk or something else different for a coffee table/foot rest. The basement will be our hang out room, game room and TV room all in one, so we're going to want somewhere to put our feet up.

We've decided to find the perfect rug first, then pick out other stuff like couches, paint colors, etc.  We've done the opposite in our living room, and we've discovered that 1)we're really picky about rugs, 2)our tastes vary greatly and 3)it's really hard to find a rug after the fact.

So that's where we are with the basement. We're doing funky colors in the laundry area, classic colors in the bathroom, and warm cozy colors in the great room. And somehow I will figure out how to tie it all together. :-)

Thursday, August 27, 2009

Making Some Room

I've mentioned a few times that we've started demolition in the basement. We're kind of overwhelmed by the amount of garbage that this demo is generating. There isn't really anything that can be done about it, but it is slowing the process down as we're making garbage faster than we can get rid of it each week.

However, we are making progress, and here is some proof. Last weekend we worked on the stairwell, as someone had decided to actually narrow the stairwell by about a foot and a half. The stairwells to the upstairs and the attic are about four feet wide, and the basement stairs had been narrowed to about 2 1/2 feet. They also lowered the ceiling at the base of the stairs. Although Lover and I are both on the short side, we do frequently have people over that are a bit taller. We thought they would appreciate being able to stand up straight at the bottom of the stairs.

Here's what the stairs looked like before:

And here's a "during" picture:

It really feels a lot more open already. I'm looking forward to having this project done!

Making Some Room

I've mentioned a few times that we've started demolition in the basement. We're kind of overwhelmed by the amount of garbage that this demo is generating. There isn't really anything that can be done about it, but it is slowing the process down as we're making garbage faster than we can get rid of it each week.

However, we are making progress, and here is some proof. Last weekend we worked on the stairwell, as someone had decided to actually narrow the stairwell by about a foot and a half. The stairwells to the upstairs and the attic are about four feet wide, and the basement stairs had been narrowed to about 2 1/2 feet. They also lowered the ceiling at the base of the stairs. Although Lover and I are both on the short side, we do frequently have people over that are a bit taller. We thought they would appreciate being able to stand up straight at the bottom of the stairs.

Here's what the stairs looked like before:


And here's a "during" picture:


It really feels a lot more open already. I'm looking forward to having this project done!

Tuesday, August 25, 2009

When I said adventures in remodeling, I didn't sign up for this...

We're working on our basement (remember how it flooded a few months ago?) and the demolition is unreal. We have such a huge pile at the bottom of the stairs that I doubt we'll ever get it all out of there. This past weekend we were working on re-widening the stairs (the previous owners had brought the four foot wide stairwell down to about three feet, for some unknown reason) and we found some "treasures."


Two dirty publications and some unmarked VHS tapes. I'm not even going to guess what is on those tapes. Eww.

The best part, if you can say that, is that they were totally inaccessible unless you were doing what we were, tearing out the stairs. So,how did that line of reasoning go? "I'll get to enjoy these next time we remodel the stairs."??? Brilliant, if I do say so. My other theory? The wife found out about his secret stash and got even, placing them somewhere he'd never be able to get to them again. Can you imagine that conversation?

Husband: Wife, have you seen my, um, "reading" material?
Wife: Yes, dear, I have. They were in a terrible location though, so I moved them.
Husband: To where?
Wife: Under the builtin stairs. Thought that might be more convenient.

:-)

Saturday, August 22, 2009

Light and Airy Laundry Room


I found this "Deluxe Wooden Coat Rack" at a garage sale last week for one dollar.

I had been trying to find something that would be the missing link for my little laundry room makeover. I needed a row of hooks on the empty wall for hanging delicates and items that couldn't go in the dryer. But every hook I could find at Lowes and the like were at least $2 a piece. Adding a whole row of them would prove costly.

A can of white spray paint made this coat rack fit in nicely with the rest of the items in my fresh and clean laundry room.

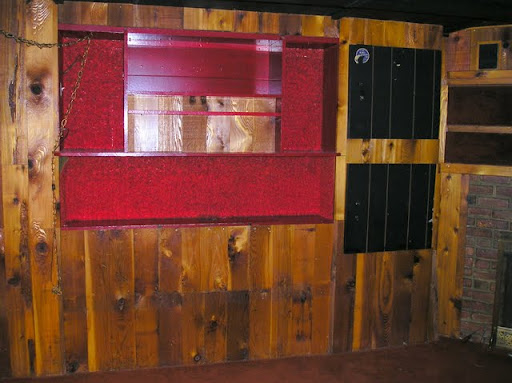
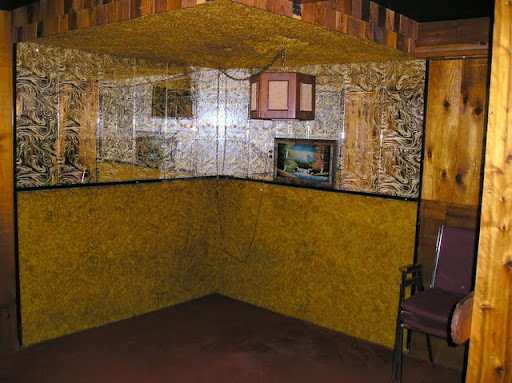
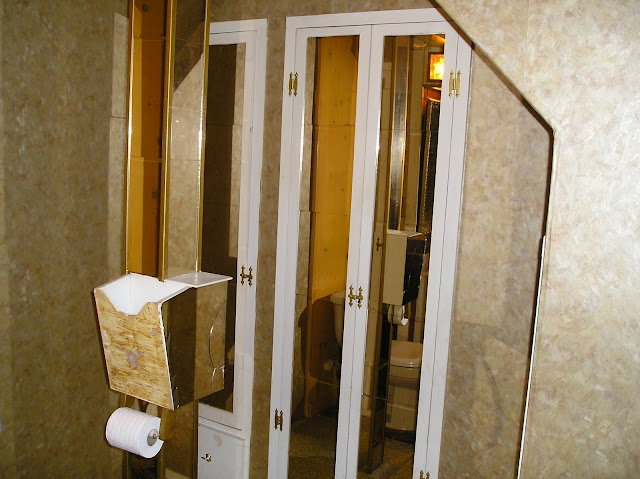
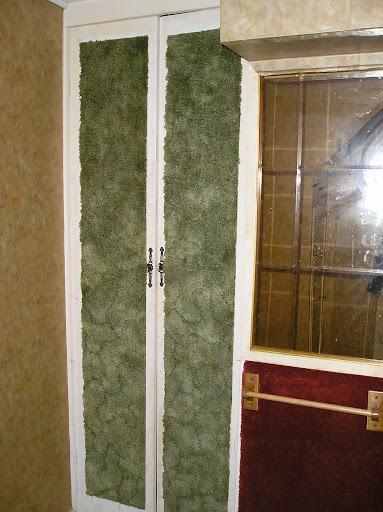
Here's what the laundry "nook" looked like when we bought the house. Notice the paneling, the lovely wallpaper on the left wall, and the psychadelic colors of the cabinet on the right.


My father was kind enough to spend a few hours painting this room before we moved the washing machine and dryer into the room. I spent a few months searching for the right fabric to bring some happy color into the now fresh and clean space.

I hung a sheer panel over the doorway where the carpet covered doors had been. I used a blue on white polka dot cotton to make a screen to cover the electrical box. It's hanging from curtain clips on a wire, so it can be easily moved aside when we need to access the panel.


I had the wooden shelf with a heart cutout already, given to me when my parents moved. A couple of coats of white paint helped freshen it up, and I "accessorized" it with some faux blue hydrangeas, a picture of Lover and I, some Oxiclean in a white jar, and a white plastic box holding dryer sheets. I had all of these things, so there was no additional cost.

On the left wall, I took cork panels taken off the walls of the office and covered them in another polka dot print, this one with richer colors. I figure I can use these panels to hold spare buttons, stain remover tips, etc.


Below the cork panels I hung a watercolor I did of some laundry drying in the breeze. Isn't it pretty?

On the left wall, I put some pegboard hooks on the now white cabinet, and the coat rack on the adjacent wall. (Opposite the washer and dryer) Above the rack I freehanded the saying "Life and Laundry, Loads of Fun!"


Doing laundry in this area is much more pleasant now, and I love that I spent about $15 to make it enjoyable. Here's to makeovers on a dime!

Linked to Metamorphosis Monday and Thrifty Treasures. Check out the other tranformations and great finds!

Related Posts with Thumbnails

Blog Top Sites

Home & Garden Blogs
>

  © Blogger template 'Morning Drink' by Ourblogtemplates.com 2008

Back to TOP  

GoStats hit counter