We've moved!

You will be automatically redirected to our new home in 5 seconds. If that does not occur,or you don't want to wait, visit
WordsOnWendhurst.com
Don't forget to update your bookmarks!

Showing posts with label cooking. Show all posts

Friday, June 4, 2010

Friday Fav: World's Greatest Bean Dip

Today I am sharing a recipe that will change your life. It will also change your body, by adding many, many pounds to your hips. :-) This stuff is the best there is, and it is seriously addictive. I always keep the three necessary ingredients around, as this is a quick and simple dip that is a hit at every party.

World's Greatest Bean Dip


Ingredients:
One can of Hormel Chili with Beans
One 8 oz package of cream cheese
1-2cups shredded cheddar cheese
Tortilla Chips

Directions:

Spread entire package of cream cheese over bottom of a glass pie plate.

Cover cream cheese with bean chili.


Cover chili with shredded cheese.

Place in microwave, heat on high for five minutes or until shredded cheese is melted and dip is bubbling.

Remove from microwave and devour with tortilla chips.

You're welcome.

Friday, February 19, 2010

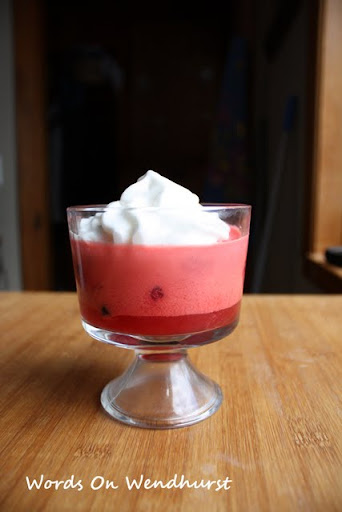
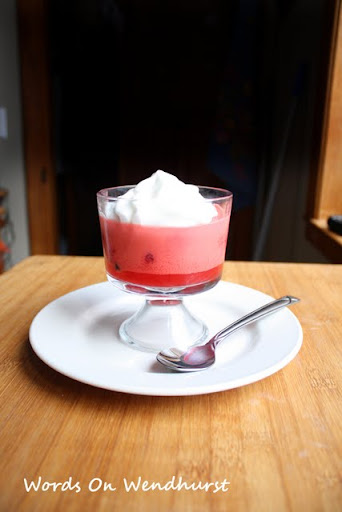
Friday Favs: Magic Jell-O

If you need a quick and easy standby recipe for a dessert, I've got it for you. I've yet to meet anyone who does not rave over this dessert. (Well, except for my picky brother in law, but he doesn't count.) :-) This recipe is simple, takes about 10 minutes to make, and is ready for company that evening.

"Jell-O? I could be Jell-O."


"You're never gonna be Jell-O!"


"I have to be Jell-O! "


(name that movie)


Magic Mousse Jell-O


What you will need:

  • Jell-O package (3 oz size) , any flavor (I think the berry flavors are best with this recipe)

  • 1 1/2 cups boiling water

  • 1 8oz tub of Cool Whip, frozen or thawed.

  • Berries, any kind, frozen or fresh about 1 pint.


Pour the Jell-O in a bowl. Mix with the boiling water until completely dissolved, about 1-2 minutes. Quickly add the cool whip in large chunks, stirring the mixture with a whisk until completely dissolved.

Place a few berries in the bottom of your cups. Pour Jell-O mixture over the berries, and refrigerate for 4 hours. Jell-o will magically layer while it is setting.

When set, top with more Cool Whip and eat up the yummy goodness!

Makes 4 1/2 cup servings. Enjoy!


Recipe created by Jell-O.

Linked to Finer Things Friday @ Amy's Finer Things

Foodie Friday @ Designs By Gollum

Sunday, January 24, 2010

Spinach Stuffed Chicken with Bacon


Lover and I are enjoying a lazy Sunday afternoon, especially because Lover just finished working 32 hours over the course of Friday and Saturday. It's insanity I tell ya! We decided to make up something delicious for dinner, using whatever we had in the fridge. We decided on spinach stuffed-bacon wrapped chicken breasts, and let me tell you, they were ah-mazing! Here they are all ready to go in the oven:

And then on our plates, ready to be devoured.


If you'd like to make your own, here are some guidelines:

Ingredients:
  • 4 green onions, sliced
  • one medium onion, diced
  • one stalk of celery, sliced
  • two cloves of garlic, diced
  • frozen spinach
  • two handfuls of mozzarella
  • small container of ricotta
  • four large chicken breasts
  • 6-7 bacon strips
  • spices (thyme, garlic powder, rotisserie chicken spices, etc)
  • a little salt
We chopped the onions, celery and garlic, (and thyme to taste) and sauteed them all in oil till tender. While that was cooking, we heated up the spinach in another pan with water. Once the spinach was warm ,we added it to the onion mixture, along with the ricotta (about half the container) When the ricotta was heated, we added the handfuls of mozzarella, and then let it all simmer together for about 5 minutes. While it simmered, we trimmed the breasts and cut them open for stuffing. We sprinkled them inside and out with garlic powder and rotisserie chicken spice.

Then we carefully stuffed the breasts, keeping them closed with toothpicks and wrapped the bacon around them. Then we set them in a glass pan we had sprayed with cooking oil, and cooked them for about 15 min, or until they showed a safe temperature.

All that's left to do is enjoy the yummy goodness!

Linked to
Metamorphosis Monday @ Between Naps On The Porch
Made It for Monday @ Cottage Instincts
Make Your Monday @ Twice Remembered
Making the World Cuter Mondays @ Making the World Cuter

DIY Day @ A Soft Place to Land


Spinach Stuffed Chicken with Bacon


Lover and I are enjoying a lazy Sunday afternoon, especially because Lover just finished working 32 hours over the course of Friday and Saturday. It's insanity I tell ya! We decided to make up something delicious for dinner, using whatever we had in the fridge. We decided on spinach stuffed-bacon wrapped chicken breasts, and let me tell you, they were ah-mazing! Here they are all ready to go in the oven:


And then on our plates, ready to be devoured.


If you'd like to make your own, here are some guidelines:

Ingredients:


  • 4 green onions, sliced

  • one medium onion, diced

  • one stalk of celery, sliced

  • two cloves of garlic, diced

  • frozen spinach

  • two handfuls of mozzarella

  • small container of ricotta

  • four large chicken breasts

  • 6-7 bacon strips

  • spices (thyme, garlic powder, rotisserie chicken spices, etc)

  • a little salt


We chopped the onions, celery and garlic, (and thyme to taste) and sauteed them all in oil till tender. While that was cooking, we heated up the spinach in another pan with water. Once the spinach was warm ,we added it to the onion mixture, along with the ricotta (about half the container) When the ricotta was heated, we added the handfuls of mozzarella, and then let it all simmer together for about 5 minutes. While it simmered, we trimmed the breasts and cut them open for stuffing. We sprinkled them inside and out with garlic powder and rotisserie chicken spice.

Then we carefully stuffed the breasts, keeping them closed with toothpicks and wrapped the bacon around them. Then we set them in a glass pan we had sprayed with cooking oil, and cooked them for about 15 min, or until they showed a safe temperature.

All that's left to do is enjoy the yummy goodness!

Linked to

Metamorphosis Monday @ Between Naps On The Porch

Made It for Monday @ Cottage Instincts

Make Your Monday @ Twice Remembered

Making the World Cuter Mondays @ Making the World Cuter


DIY Day @ A Soft Place to Land

Foodie Friday @ Designs By Gollum

Monday, November 30, 2009

Dare to DIY: Easy Fudge Recipe


This week for Dare to DIY we are sharing our favorite Christmas cookie recipe. What are my favorite Christmas cookies? Well, they're not cookies at all. They're fudge. I love fudge with a passion, and two years ago I set out to learn how to make it so I could gain 10lbs over the Christmas season enjoy the fruit of my labor. I first tried a recipe that was a lot more complicated, and it used marshmallow fluff, which I am not a fan of. It also required watching the temperature of the fudge and yada yada, other complicated things. Not my cup of tea. So last year I did some research and found this amazing fudge recipe from Carnation that is the simplest recipe you ever did see. It's oh so chocolate-y, light, smooth and creamy.

Carnation Famous Fudge Recipe

Ingredients:
1 1/2 cups granulated sugar
2/3 cup (5 fl.-oz. can) NESTLÉ® CARNATION® Evaporated Milk
2 tablespoons butter or margarine
1/4 teaspoon salt
2 cups miniature marshmallows
1 1/2 cups (9 oz.) NESTLÉ® TOLL HOUSE® Semi-Sweet Chocolate Morsels
1/2 cup chopped pecans or walnuts (optional)
1 teaspoon vanilla extract

Directions:
LINE 8-inch-square baking pan with foil.

COMBINE sugar, evaporated milk, butter and salt in medium, heavy-duty saucepan. Bring to a full rolling boil over medium heat, stirring constantly. Boil, stirring constantly, for 4 to 5 minutes. Remove from heat.

STIR in marshmallows, morsels, nuts and vanilla extract. Stir vigorously for 1 minute or until marshmallows are melted. Pour into prepared baking pan; refrigerate for 2 hours or until firm. Lift from pan; remove foil. Cut into 48 pieces.

The best part about this fudge recipe is that it can easily be modified for different flavors. There are so many great flavored chips out there, You can easily sub in a cup of peanut butter/chocolate swirls, or peppermint, or white chocolate and dark chocolate. Then you can give a variety of fudge flavors with your Christmas cookies! That is, of course, if you haven't eaten it all by then. :-)

Enjoy! Be sure to check out all the other yummy cookie recipes over at Kim's!

Linked to DIY Day @ A Soft Place to Land

Original recipe here

Friday, October 23, 2009

Ultimate Chocolate Cake


A few weeks ago my soon to be sister-in-law and I got together for some "girl time." She brought this awesome chocolate cake and some chocolate covered strawberries. Let me tell you, this stuff is AWESOME. Our local grocery chain, Wegmans, held a contest a while back to find the ultimate chocolate cake recipe. They came up with a moist, rich chocolate cake with a creamy frosting, that is the ultimate fix for when you really want some decadent chocolate. I'm not usually much for chocolate flavored things (I prefer just straight chocolate), but this one really takes the cake. (Takes the cake, get it?) Unfortunately, they don't share their super secret recipe, so I did some hunting of my own, and found you this Too Much Chocolate Cake (is there any such thing?) recipe that gets rave reviews on allrecipes.com and won first prize at the creator's county fair. So, because I am in a sharing mood, you can get in on the fun!

Too Much Chocolate Cake

INGREDIENTS:

  • 1 (18.25 ounce) package devil's food cake mix
  • 1 (5.9 ounce) package instant chocolate pudding mix
  • 1 cup sour cream
  • 1 cup vegetable oil
  • 4 eggs
  • 1/2 cup warm water
  • 2 cups semisweet chocolate chips

DIRECTIONS:

  1. Preheat oven to 350 degrees F (175 degrees C).
  2. In a large bowl, mix together the cake and pudding mixes, sour cream, oil, beaten eggs and water. Stir in the chocolate chips and pour batter into a well greased 12 cup bundt pan.
  3. Bake for 50 to 55 minutes, or until top is springy to the touch and a wooden toothpick inserted comes out clean. Cool cake thoroughly in pan at least an hour and a half before inverting onto a plate If desired, dust the cake with powdered sugar.
Original recipe here. Also, if you'd rather make your frosting from scratch, you can use this recipe. :-) You're welcome!

Friday, October 9, 2009

Ultimate Chocolate Chip Cookie


It's been rainy and cold here for the last several days, and weather like this always makes me want to bake. Most of the time I default to this delicious chocolate chip recipe. I found it on another blog, but it is originally from this allrecipes.com recipe. If you like your cookies chewy and soft (and huge!) then you will LOVE this recipe. Make sure to follow it exactly, and remember, more chocolate is always a good thing! ;-)

Ultimate Chocolate Chip Cookie

Ingredients
2 cups all-purpose flour
1/2 teaspoon baking soda
1/2 teaspoon salt
3/4 cup unsalted butter,
melted
1 cup packed brown sugar
1/2 cup white sugar
1 tablespoon vanilla extract
1 egg
1 egg yolk
2 cups semi-sweet
chocolate chips (I only used about 1 cup - 2 seems excessive)

Directions
Preheat the oven to 325 degrees F (165 degrees C). Grease cookie sheets or line with parchment paper.
Sift together the flour, baking soda and salt; set aside.

In a medium bowl, cream together the melted butter, brown sugar and white sugar until well blended. Beat in the vanilla, egg, and egg yolk until light and creamy. Mix in the sifted ingredients until just blended. Stir in the
chocolate chips by hand using a wooden spoon. Drop cookie dough 1/4 cup at a time onto the prepared cookie sheets. Cookies should be about 3 inches apart.

Bake for 15 to 17 minutes in the preheated oven, or until the edges are lightly toasted. Cool on baking sheets for a few minutes before transferring to wire racks to cool completely.


Oh, and my favorite tip for keeping cookies soft and chewy? Put them on a plate or in a container with a piece of bread. The bread will get all hard and stale, but the cookies will be perfect. These are amazing, and Lover (hater of all things sweet, except for me, of course) likes them a lot.

Linked to Hooked on Fridays. What are you hooked on?

Ultimate Chocolate Chip Cookie


It's been rainy and cold here for the last several days, and weather like this always makes me want to bake. Most of the time I default to this delicious chocolate chip recipe. I found it on another blog, but it is originally from this allrecipes.com recipe. If you like your cookies chewy and soft (and huge!) then you will LOVE this recipe. Make sure to follow it exactly, and remember, more chocolate is always a good thing! ;-)

Ultimate Chocolate Chip Cookie

Ingredients
2 cups all-purpose flour
1/2 teaspoon baking soda
1/2 teaspoon salt
3/4 cup unsalted butter,
melted
1 cup packed brown sugar
1/2 cup white sugar
1 tablespoon vanilla extract
1 egg
1 egg yolk
2 cups semi-sweet
chocolate chips (I only used about 1 cup - 2 seems excessive)

Directions
Preheat the oven to 325 degrees F (165 degrees C). Grease cookie sheets or line with parchment paper.
Sift together the flour, baking soda and salt; set aside.

In a medium bowl, cream together the melted butter, brown sugar and white sugar until well blended. Beat in the vanilla, egg, and egg yolk until light and creamy. Mix in the sifted ingredients until just blended. Stir in the
chocolate chips by hand using a wooden spoon. Drop cookie dough 1/4 cup at a time onto the prepared cookie sheets. Cookies should be about 3 inches apart.

Bake for 15 to 17 minutes in the preheated oven, or until the edges are lightly toasted. Cool on baking sheets for a few minutes before transferring to wire racks to cool completely.


Oh, and my favorite tip for keeping cookies soft and chewy? Put them on a plate or in a container with a piece of bread. The bread will get all hard and stale, but the cookies will be perfect. These are amazing, and Lover (hater of all things sweet, except for me, of course) likes them a lot.

Linked to Hooked on Fridays. What are you hooked on?

Monday, September 28, 2009

Freezer Meals Menu


We have a huge freezer in the basement that came with our castle. In fact, I think it was installed the day the house was built, because there is no way that it would fit through the basement kitchen door, now that the basement has been remodeled. It comes in really handy for stocking up on meat sales, freezing fresh fruit and vegetables, and of course, staying stocked up on ice cream. ;-)


Lover and I sat down the other day and decided on a list of a few easy meals that freeze well that we would like to keep stocked in the freezer. Here's what we came up with.
  • Chicken Marsala - This is the easiest, and yummiest meal ever, and great for guests. No. of portions: 4 (guest sized)
  • Lasagna - Is there anything that freezes better than this? Yum. No. of portions: 4 square pans
  • Fajitas - this meal keeps ridiculously well in the freezer, and is so simple to make up. No. of portions: 4
  • Quesadillas - Lover makes THE best quesadillas in the world. We test froze some and they held up great. No. of portions: 2
  • Stir Fry Chicken - If the chicken is all seasoned and ready, then making up a meal of stir fry is a piece of cake. Portions: 4
  • Spinach Dip - Once again, this is Lover's domain (have I mentioned that my husband is a gourmet cook?) Portions: 8 small dishes
  • Pizza - Homemade pizza. Best. Ever. Portions: 4
There are a few other ingredients that need to be frozen along with these meals to make the meal complete:
  • 1 package fajita tortillas
  • 2 baguettes
  • Ciabatta bread, made into garlic bread for the spinach dip (about 16 mini loaves)
Along with all of this, we like to keep the freezer stocked with:
  • A bunch of cooked, seasoned chicken breasts that can be easily thawed for chicken salad, quesadillas, etc.
  • Shredded cheese (mozzarella and cheddar)
  • Butter
  • Vanilla Ice Cream (for all those desserts that are made scrumptious by a scoop of vanilla)
  • Peppers and Onions (Sliced and in meal sized portions)
  • Strawberries (for desserts and smoothies)
  • Bananas (sliced, for smoothies and banana bread)
  • Several packages of hot dog and hamburger buns
Last week I listed my goals for fall and stocking the freezer was one of the goals. Hopefully I will be able to get this done soon! :-)

What about you? What do you keep stocked in your freezer? Besides ice cream of course. :-)

Wednesday, August 26, 2009

How to make Weekly Meal Plans


Image taken from here

If you're anything like me, figuring out what to make for dinner each night can be quite the struggle. After a few years of "fulltime" cooking, I've come up with a pretty foolproof plan that eliminates the 4pm meltdown of "what's for dinner?"

There are a few things that make meal planning easier:
  • Stocked pantry (items you regularly use in meals, such as cream of mushroom soup)
  • Freezer large enough to stock up on meat (when meats go on sale)
  • Crockpot (for those days when it is just too busy or too hot to cook)
  • Grocery Database (to track sales and prices... it'll save you money!)

First, look at your calendar and determine how many meals you will need to make this week, as well as any notes about what those meals should be.

Image taken from here

For us, this week is a little busy, but we don't have anything major going on. Monday thru Wednesday we have an event at church every evening, so meals need to be quick and simple in order to make it on time. Thursday, Lover has a meeting over dinner, so he won't be home, and we may be going camping next weekend, which means that meals need to be campfire appropriate.

If we were having someone over for dinner, I would make a note of that, and if we had plans to go out to eat I'd put that into the plan as well.

Usually, I end up with 4-5 meals over a week's time, or 8-10 meals over a two week period. (which is how I usually make my meal plans)

Now I am going to take a look at my stocked meats and frozen foods. Do I have anything that needs to be used up? There's some beef in there that is nearing its expiration date, so I'll put that on the menu. Nothing else is reaching its past due point, so anything is fair game. (Get it? Fair game? Tee hee) I'll also look at sales this week for meat. Chicken is on sale for $1.79/lb at my local store, so I know I'll be stocking up on chicken. I make a note to include several chicken meals this week.

Next I will go through my recipes, noting any favorites that look appealing, as well as any new recipes that I've been wanting to give a try. This is where I also ask Lover if he has any "cravings" for the week. He usually answers "Mexican" so I'll include fajitas on one of my days this week.

Next I make up my grocery list, while consulting my pantry, freezer and fridge to determine what ingredients I'll need to make the meals this week. This is when I also write down items needed for lunches throughout the week.

Instead of assigning a meal to each specific day, I simply post a list of the "weekly meals" somewhere on the fridge. This allows me to choose whatever meal I am in the mood for on a particular day. My meals for this week are:
  • Chicken Caesar Salad
  • Fajitas
  • Beef Burgandy (in the crockpot)
  • Barbecue Chicken and Grilled Veggies
  • Chicken Pasta Salad (my new recipe to try this week)

So, in conclusion, our steps are:
  1. Check your calendar to see how your social activities will affect your meal plan.
  2. Determine how many meals you will need to make.
  3. Check stocked meats for expiration, and sales for bargain meat.
  4. Go through recipes and decide on your required number of meals for the week.
  5. Make shopping list, after checking pantry, fridge and freezer for supplies.
  6. Go shopping
  7. Assign a meal to each day, if you prefer.

How to make Weekly Meal Plans


Image taken from here


If you're anything like me, figuring out what to make for dinner each night can be quite the struggle. After a few years of "fulltime" cooking, I've come up with a pretty foolproof plan that eliminates the 4pm meltdown of "what's for dinner?"

There are a few things that make meal planning easier:


  • Stocked pantry (items you regularly use in meals, such as cream of mushroom soup)

  • Freezer large enough to stock up on meat (when meats go on sale)

  • Crockpot (for those days when it is just too busy or too hot to cook)

  • Grocery Database (to track sales and prices... it'll save you money!)


First, look at your calendar and determine how many meals you will need to make this week, as well as any notes about what those meals should be.


Image taken from here


For us, this week is a little busy, but we don't have anything major going on. Monday thru Wednesday we have an event at church every evening, so meals need to be quick and simple in order to make it on time. Thursday, Lover has a meeting over dinner, so he won't be home, and we may be going camping next weekend, which means that meals need to be campfire appropriate.

If we were having someone over for dinner, I would make a note of that, and if we had plans to go out to eat I'd put that into the plan as well.

Usually, I end up with 4-5 meals over a week's time, or 8-10 meals over a two week period. (which is how I usually make my meal plans)

Now I am going to take a look at my stocked meats and frozen foods. Do I have anything that needs to be used up? There's some beef in there that is nearing its expiration date, so I'll put that on the menu. Nothing else is reaching its past due point, so anything is fair game. (Get it? Fair game? Tee hee) I'll also look at sales this week for meat. Chicken is on sale for $1.79/lb at my local store, so I know I'll be stocking up on chicken. I make a note to include several chicken meals this week.

Next I will go through my recipes, noting any favorites that look appealing, as well as any new recipes that I've been wanting to give a try. This is where I also ask Lover if he has any "cravings" for the week. He usually answers "Mexican" so I'll include fajitas on one of my days this week.

Next I make up my grocery list, while consulting my pantry, freezer and fridge to determine what ingredients I'll need to make the meals this week. This is when I also write down items needed for lunches throughout the week.

Instead of assigning a meal to each specific day, I simply post a list of the "weekly meals" somewhere on the fridge. This allows me to choose whatever meal I am in the mood for on a particular day. My meals for this week are:


  • Chicken Caesar Salad

  • Fajitas

  • Beef Burgandy (in the crockpot)

  • Barbecue Chicken and Grilled Veggies

  • Chicken Pasta Salad (my new recipe to try this week)


So, in conclusion, our steps are:


  1. Check your calendar to see how your social activities will affect your meal plan.

  2. Determine how many meals you will need to make.

  3. Check stocked meats for expiration, and sales for bargain meat.

  4. Go through recipes and decide on your required number of meals for the week.

  5. Make shopping list, after checking pantry, fridge and freezer for supplies.

  6. Go shopping

  7. Assign a meal to each day, if you prefer.


Related Posts with Thumbnails

Blog Top Sites

Home & Garden Blogs
>

  © Blogger template 'Morning Drink' by Ourblogtemplates.com 2008

Back to TOP  

GoStats hit counter